10+ AI Photo Editing Prompts: Make Your Photos Look Professional with ChatGPT & Gemini
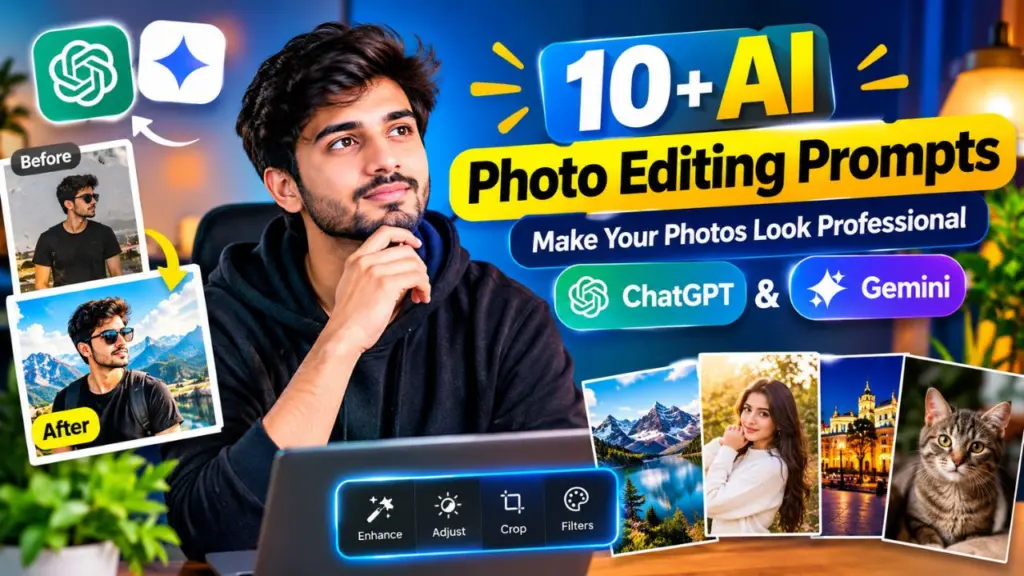
10+ AI Photo Editing Prompts: You do not need Photoshop, Lightroom, or years of editing experience to get a polished, professional-looking photo anymore. Today, a well-written sentence can fix bad lighting, remove a messy background, retouch a portrait, or turn a plain phone snap into a studio-quality product shot.
The catch is simple: the quality of your result depends almost entirely on the quality of your prompt. A vague request like “make this photo better” gives vague results. A clear, structured prompt gives you something you can actually post, print, or sell.
In this guide, you will get 15 tested, copy-paste AI photo editing prompts that work with both ChatGPT and Google Gemini, along with the formula behind them, common mistakes to avoid, and tips to get consistent, natural-looking results.
What Are AI Photo Editing Prompts?
AI photo editing prompts are written instructions you give to an AI tool, along with an uploaded photo, telling it exactly what to change. Instead of dragging sliders or using masks and layers, you describe the edit in plain English, and the AI applies it.
Both ChatGPT and Gemini can now take an image you upload and edit it based on your text instruction. You can change lighting, swap backgrounds, adjust colors, remove unwanted objects, retouch skin, restyle the whole image, or restore an old photo, all through conversation.
The big advantage is speed and accessibility. The big limitation is control: the AI interprets your words, so the more precisely you write, the closer the result will be to what you imagined.
Why Prompts Matter More Than the Tool
Many people assume the AI model alone decides the quality. In practice, two people can upload the same photo to the same tool and get completely different results purely because of how they wrote the prompt.
A strong prompt does three things:
- It tells the AI what to change.
- It tells the AI what to keep exactly the same.
- It tells the AI what the final result should feel like.
Most beginners only do the first. That is why faces sometimes change, backgrounds look fake, and colors feel overdone. Adding “keep” instructions is the single biggest upgrade you can make.
The Simple Formula for a Perfect Photo Editing Prompt
Use this structure whenever you write your own prompt:
[Action] + [Subject] + [Style or Look] + [Lighting and Color] + [What to Preserve] + [Quality Level]
Here is an example built from the formula:
Enhance this portrait for a professional LinkedIn headshot. Use soft, natural window-style lighting, a clean neutral gray background, and balanced warm skin tones. Keep my face, hairstyle, expression, and clothing exactly the same. High resolution, sharp focus on the eyes, realistic look.
Notice how every part of the formula appears. You can swap in your own details and reuse the same pattern for any photo.
Before You Start: Quick Setup Tips
A few small habits make a big difference to every prompt below:
- Upload the highest-quality original you have. AI can improve a photo, but it cannot fully rescue a tiny, blurry thumbnail.
- Edit one thing at a time. Asking for ten changes in one prompt often leads to messy results. Do lighting first, then background, then style.
- Always say what to keep. Phrases like “keep the face unchanged” and “do not alter the pose” protect your subject.
- Use follow-up messages. If the first result is close but not perfect, reply with a small correction instead of starting over.
- Check the details. Zoom in on hands, eyes, text, and edges, since these are where AI most often makes mistakes.
Prompt 1: Professional Headshot Enhancement
Perfect for LinkedIn, resumes, company websites, and speaker profiles.
Edit this photo into a professional corporate headshot. Replace the background with a clean, softly blurred neutral gray studio backdrop. Apply soft, flattering studio lighting on the face with gentle shadows. Keep my face, facial features, hairstyle, and expression exactly the same. Make the outfit look neat and wrinkle-free. Natural skin texture, sharp eyes, high resolution.
Why it works: It changes the environment and polish while locking down identity, which is the most important rule for portraits.
Prompt 2: Natural Skin Retouching
For a clean, camera-ready look without the plastic “over-filtered” effect.
Retouch this portrait with subtle, natural skin smoothing. Reduce small blemishes, shine, and under-eye shadows, but keep visible skin texture, pores, and natural details. Do not change the shape of the face, eyes, nose, or lips. Keep the original skin tone and overall look realistic.
Why it works: The phrase “keep visible skin texture” prevents the waxy, fake look that heavy retouching creates.
Prompt 3: Fix Bad Lighting
Great for indoor photos, dark selfies, or harsh midday shots.
Fix the lighting in this photo. Brighten the shadows on the face, reduce harsh highlights, and balance the exposure so it looks like it was taken in soft natural daylight. Keep colors accurate and realistic. Do not change the composition, pose, or background.
Why it works: It names the exact lighting problem and gives a clear target (“soft natural daylight”).
Prompt 4: Background Replacement
Ideal for profile pictures, social media, and creative projects.
Replace the background of this photo with a modern, softly blurred cafe interior with warm, natural light. Keep the subject exactly the same, with clean, natural edges around hair and clothing. Match the lighting and color temperature of the new background to the subject so it looks realistic.
Why it works: The instruction to “match lighting and color temperature” is what makes a swapped background look believable instead of pasted on.
Prompt 5: Remove Unwanted Objects or People
Useful for travel photos, event shots, and cluttered scenes.
Remove the people and objects in the background behind the main subject. Fill the empty areas naturally so the scene looks clean and realistic, matching the surrounding textures, colors, and lighting. Keep the main subject and everything else unchanged.
Why it works: Telling the AI to fill areas “naturally” and match textures avoids visible smudges or odd patches.
Prompt 6: Studio-Quality Product Photo
A must-have for online sellers, small businesses, and Etsy or Amazon listings.
Turn this product photo into a professional e-commerce image. Place the product on a clean white seamless background with a soft, realistic shadow underneath. Use bright, even studio lighting, crisp edges, and accurate colors. Keep the product’s shape, logo, text, and details exactly the same. High resolution, commercial catalog style.
Why it works: It specifies the background, shadow, lighting, and, crucially, protects the product’s branding and details.
Prompt 7: Lifestyle Product Scene
When you want your product to feel real and desirable, not just clinical.
Place this product in a lifestyle scene on a light wooden table near a sunny window, with a few subtle props like a plant and a linen cloth. Use warm, soft natural light and shallow depth of field. Keep the product itself unchanged, including its label and colors. Make it look like a professional lifestyle photograph for social media.
Why it works: Props and lighting details create a story around the product while the “unchanged” rule keeps it accurate.
Prompt 8: Cinematic Color Grading
For travel, portraits, and moody social media content.
Apply a cinematic color grade to this photo with warm highlights, slightly teal shadows, and gentle contrast. Add a subtle film-like look without overdoing it. Keep the faces, composition, and details unchanged and the skin tones natural.
Why it works: Naming specific tones and saying “without overdoing it” keeps the grade stylish but tasteful.
Prompt 9: Golden Hour Glow
Make any outdoor photo look like it was shot at sunset.
Edit this photo to look like it was taken during golden hour. Add warm, soft sunset light coming from the side, gentle lens glow, and rich warm tones. Keep the subject, pose, and scene the same. Make the lighting direction consistent and realistic with natural shadows.
Why it works: Specifying light direction and natural shadows prevents the “fake filter” feeling.
Prompt 10: Sharpen and Upscale a Blurry Photo
A lifesaver for older images, screenshots, and low-resolution shots.
Enhance this blurry, low-resolution photo. Increase sharpness and clarity, reduce noise and grain, and restore fine details. Keep everything faithful to the original, including faces, clothing, and background. Do not add new objects or change anyone’s appearance.
Why it works: The final line stops the AI from inventing details, which is a common risk when upscaling.
Prompt 11: Restore and Colorize an Old Photo
Bring family memories back to life.
Restore this old photograph. Remove scratches, creases, stains, and fading. Improve sharpness and contrast, and then colorize it with realistic, historically appropriate colors and natural skin tones. Keep the faces, clothing, and composition exactly the same as the original.
Why it works: It combines repair and colorization in a clear order while protecting the faces, which matter most in family photos.
Prompt 12: Black and White Fine Art Conversion
For timeless, editorial-style images.
Convert this photo to a high-quality black and white image with rich contrast, deep blacks, soft highlights, and fine grain, in the style of classic fine art photography. Keep all details, faces, and composition unchanged.
Why it works: Referencing a photographic style gives the AI a clear visual target for tone and contrast.
Prompt 13: Remove and Replace the Sky
Perfect for landscape, real estate, and travel photos with dull skies.
Replace the dull gray sky in this photo with a clear blue sky with soft white clouds. Adjust the lighting and color tones of the rest of the image so they match the new sky naturally. Keep buildings, trees, and all other elements unchanged, with clean edges.
Why it works: Matching the rest of the scene to the new sky is what sells the realism.
Prompt 14: Turn a Photo into an Illustration or Anime Style
Fun, shareable, and great for profile pictures.
Transform this photo into a clean, high-quality digital illustration in a soft anime style, with smooth shading, expressive eyes, and vibrant colors. Keep the person’s pose, hairstyle, outfit, and overall likeness recognizable.
Why it works: It sets a style while insisting the person remains recognizable, which keeps the result personal.
Prompt 15: Social Media Ready Final Polish
Use this as a last step after your main edits.
Give this photo a final polish for Instagram. Slightly boost vibrance and contrast, add gentle sharpening, and balance the white balance so colors look clean and natural. Crop for a 4:5 portrait ratio, keeping the subject centered. Do not change any faces, objects, or the overall composition.
Why it works: It is a gentle, all-purpose finishing pass that improves the photo without altering what is in it.
ChatGPT vs Gemini: Which Is Better for Photo Editing?
Both tools can handle every prompt in this guide, but they feel slightly different in daily use.
ChatGPT tends to shine at conversational editing. You can go back and forth, give follow-up corrections like “make the background a little darker,” and refine step by step. It is also strong at following long, detailed prompts and at stylistic transformations.
Gemini is a strong choice for quick, natural-looking edits and for keeping a subject consistent across changes. Because it connects with Google’s ecosystem, it fits easily into a workflow if you already use Google Photos, Drive, or Android.
The honest answer is that results vary by photo and by prompt. Features and limits also change as these tools update, so the best approach is to test the same prompt in both and keep whichever result looks better to you.
Common Mistakes to Avoid
Even great prompts can fail if you fall into these traps:
- Being too vague. “Make it look good” leaves everything to chance.
- Forgetting to say what to preserve. This is the number one reason faces and logos get changed.
- Stacking too many edits at once. Break big changes into steps.
- Over-editing. Heavy smoothing, extreme colors, and exaggerated effects make photos look obviously artificial.
- Skipping the final check. Always zoom in to look for distorted hands, odd text, and rough edges.
- Using low-quality source images. Better input almost always means better output.
Pro Tips for More Natural, Professional Results
- Use photography language. Terms like “soft key light,” “shallow depth of field,” “golden hour,” and “85mm portrait lens” help the AI understand your target look.
- Reference a mood, not just a look. Words like “warm,” “airy,” “moody,” or “clean and minimal” guide the overall feel.
- Ask for realism explicitly. Adding “realistic, natural, not over-processed” nudges the result away from the artificial look.
- Iterate with small changes. Follow-ups like “reduce the warmth by 20 percent” or “make the shadows softer” work better than rewriting the whole prompt.
- Save your best prompts. Keep a personal library so you can reuse proven prompts and stay consistent across your content.
Responsible Use: Honesty and Consent
AI editing is powerful, so use it thoughtfully. Only edit photos you own or have permission to use, and be especially careful when editing images of other people. If you use heavily AI-altered images for commercial purposes, news, or anything where authenticity matters, consider being transparent about it. Many platforms also have their own rules about labeling AI-generated or AI-edited content, so check them before publishing.
Frequently Asked Questions
Can AI really make my photos look professional? Yes, for many everyday uses such as headshots, product photos, and social media content, AI can deliver polished results quickly. For high-stakes work like large prints or major commercial campaigns, you may still want a professional photographer or editor for final refinement.
Are these prompts free to use? The prompts themselves are free to copy. Access to image editing features in ChatGPT and Gemini depends on each platform’s current plans and limits, which can change, so check their latest options.
Will the AI change my face? It can, which is why every prompt here includes a “keep unchanged” instruction. Always include one, and review the result carefully.
Do I need to write prompts in perfect English? No. Clear, simple sentences work best. Focus on describing the change, the look you want, and what must stay the same.
What if the result is not what I wanted? Reply with a short, specific correction, such as “keep the original background” or “make the lighting softer.” Small follow-ups usually work better than starting from scratch.
Can I use these prompts on a phone? Yes. Both ChatGPT and Gemini offer mobile apps where you can upload a photo and paste in a prompt, which makes editing on the go easy.
Final Thoughts
You do not need expensive software or professional training to make your photos look polished. With the right prompt structure, a clear description of what to change, and a firm instruction about what to keep, ChatGPT and Gemini can handle everything from headshots and product shots to old photo restoration and cinematic color grading.
Start with one or two prompts from this list, adjust the details to match your photo, and build your own prompt library over time. The more precisely you describe the result you want, the more professional your photos will look.